The Locked Folder is a feature that brings a vault that’s secured by a fingerprint or a passcode. Once you put your Photos in the Locked folder, they will become inaccessible to any other apps.
The only way to access the photos is to unlock the locked folder. iPhone users can also have this feature on their Google Photos app. Here’s how.
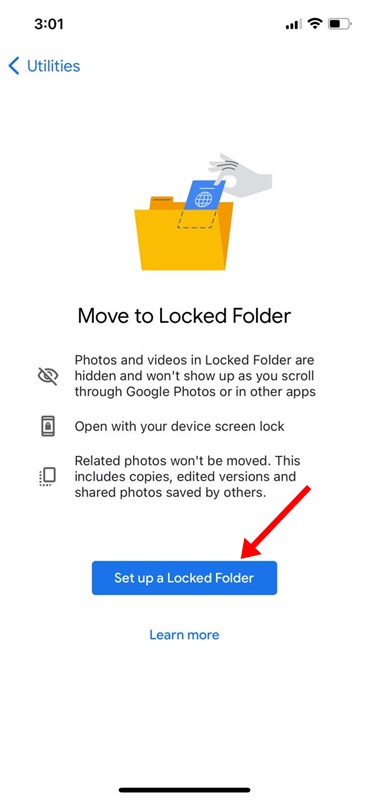
1. Set up Google Photos Locked Folder
To get started, you will have to set up a Google Photos Locked folder. Here’s how you can set up.
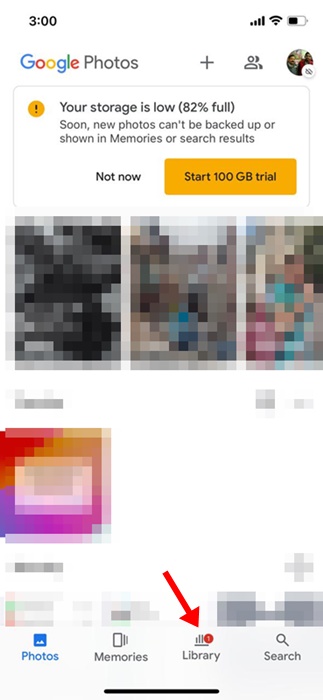
1. Open the Google Photos app on your iPhone and log in with a Google Account.
2. Switch to the Library tab.
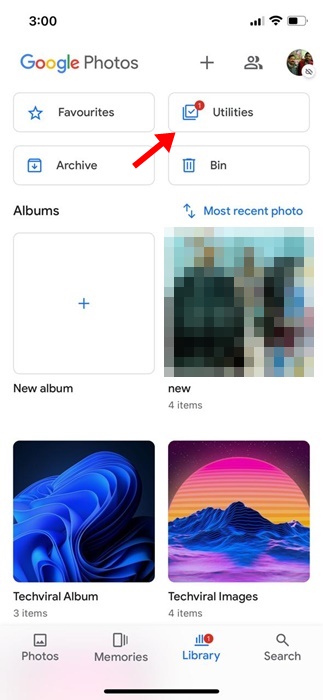
3. Tap on Utilities.
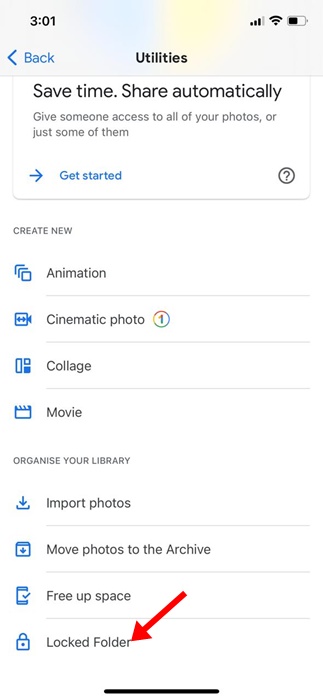
4. In the Organise your Library section, tap on Locked Folder.
5. On the Move to Locked Folder screen, tap on Set up a Locked Folder.
6. Select either Face ID or Touch ID to protect the Locked folder.
7. Select whether you want to back up Photos inside your Locked folder.
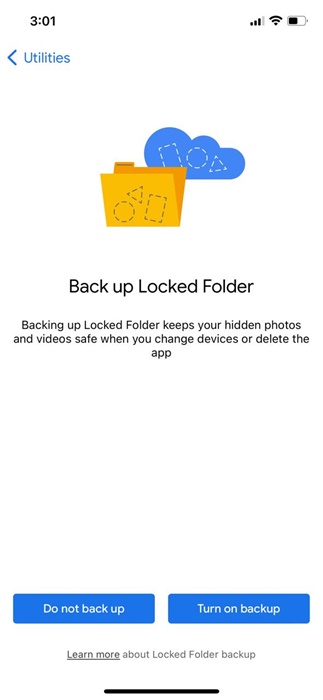
If you want to access the Photos from any other device, select the ‘Turn on Backup’ option.
2. How to Add Photos to the Locked Folder on Google Photos
Now that the setup is complete, you may want to add your private Photos to the Locked folders. Here’s how you can add it.
1. Open the Google Photos app on your iPhone.
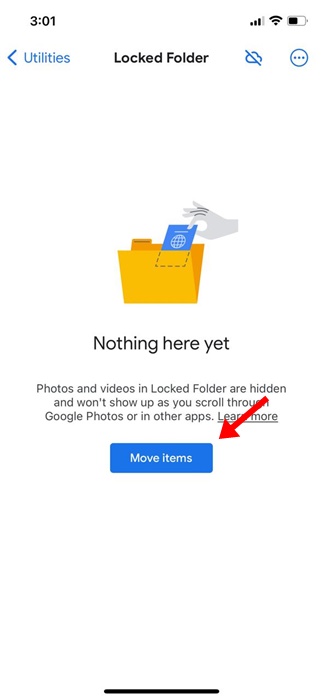
2. Navigate to the Library > Utilities > Locked Folder.
3. Tap the Move Items button.
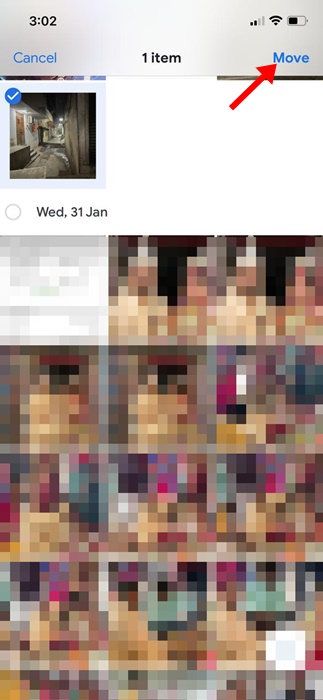
4. Select the Photos you want to move to the Locked folder.
5. Tap on Move.
6. On the Move to Locked FolderConfirmationon prompt, tap Move.

7. You can also move Photos directly from the Google Photos app. For that, open the Photo you want to move, and tap on three dots > Move to Locked folder.

3. How to Remove Photos from Google Photos Locked Folder?
Now that you know how to add Photos to the Locked Folder of Google Photos, it’s time to know how to remove them if needed. So, if, for any reason, you want to remove Photos from the Locked Folder, follow these steps.
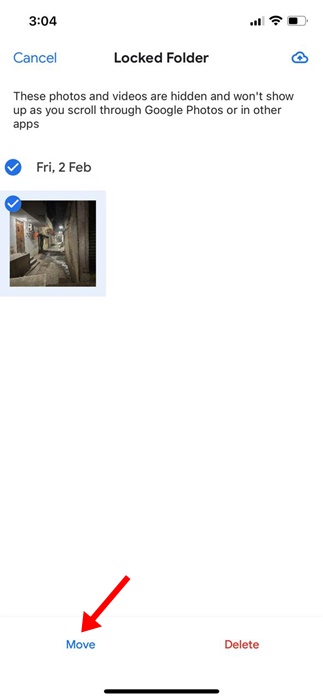
1. Open the Google Photos app on your iPhone.
2. Open the Locked Folder. Select the Photos you want to remove.
3. Tap on the Move at the bottom left corner.
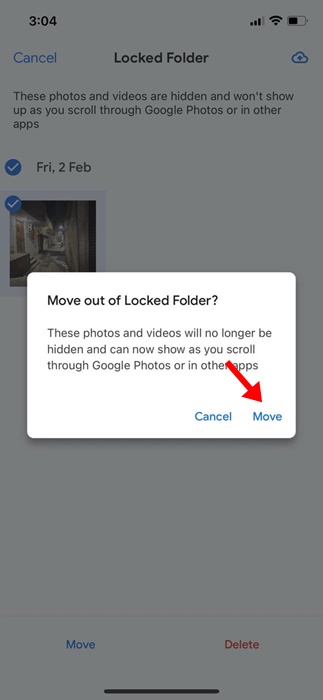
4. On the Move out of Locked FolderConfirmationon prompt, tap Move.
This guide is all about how to use the Locked Folder of Google Photos on iPhone. If you need more help using your iPhone’s Locked folder of Google Photos, let us know in the comments below.
 How to Type to Speak During iPhone Calls
 How to Remove Sound from iPhone Video