Learn to change the drive letter in Home windows 11 simply. Observe this straightforward step-by-step information and repair drive letter points rapidly!
By default, Windows 11 assigns particular letters, corresponding to E:, F:, G:, and many others., to the exhausting disk drive, however you may change them simply. In order for you, you may make the most of the Disk Administration instrument to vary the drive letters.
Essential: Some software program that depends on drive letters to work may not run after altering the drive letter. The change primarily impacts the desktop shortcut of your Home windows 11.
1. Change the Drive Letter from the Settings
You may change the drive letter utilizing Home windows 11’s Settings app. Right here’s what you want to do.
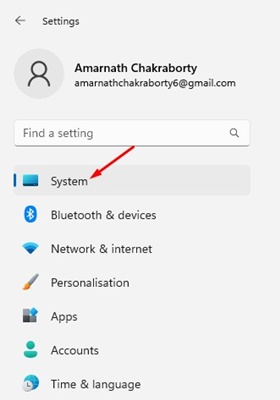
1. Click on on the Home windows 11 Begin button and choose Settings.

2. Swap to the System.
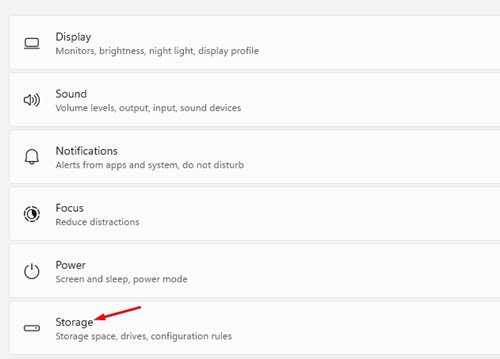
3. Click on on Storage.
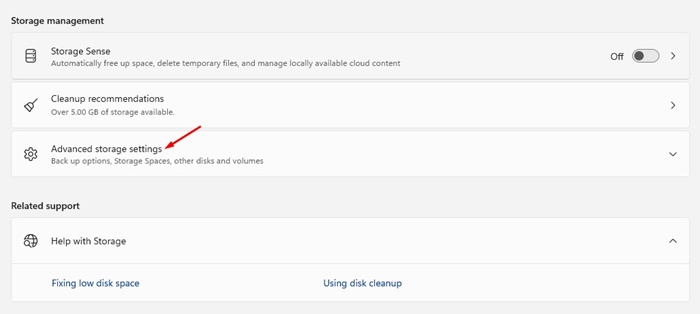
4. Scroll down and develop the Superior Storage Settings.
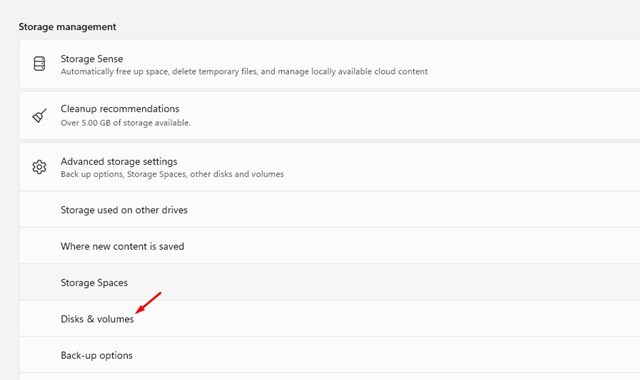
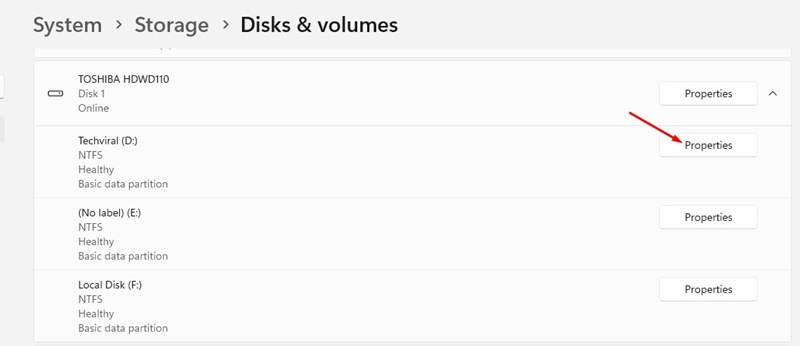
5. Choose Disks & Volumes.
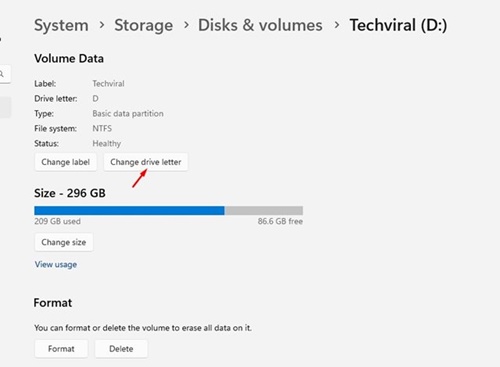
6. Click on Properties beside the disk partition whose letter you wish to change.
7. Click on Change Drive Letter.
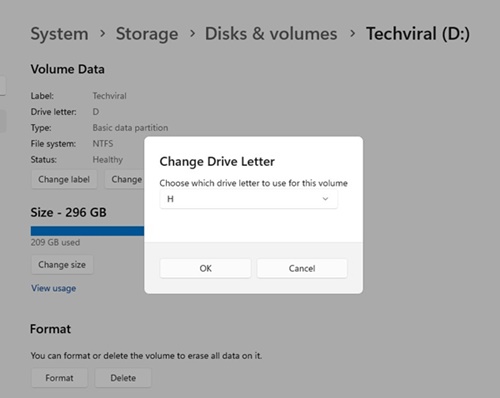
8. Use the drop-down menu to pick the new drive letter and click on Okay.
2. Change Drive Letter from the Disk Administration Instrument
You may even use the Disk Administration utility to vary the drive letter. Right here’s what you want to do.
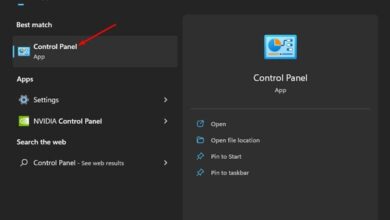
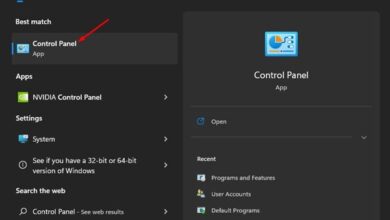
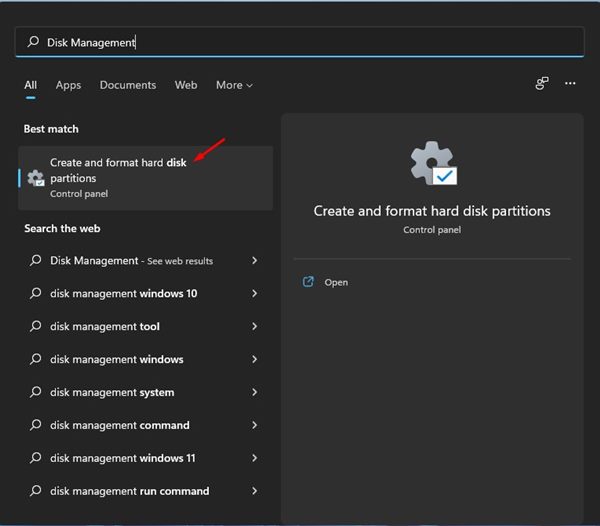
1. Open Home windows 11 Search and sort in Disk Administration.
2. Open the Create and format exhausting disk partitions from the record of choices.
3. It will open the Disk Administration utility in your Home windows 11 pc.
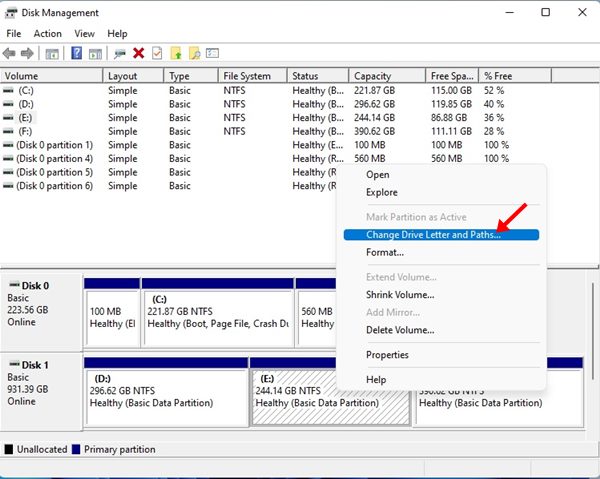
4. Proper-click on the exhausting drive whose letter you wish to change and choose Change Drive Letters and Paths.
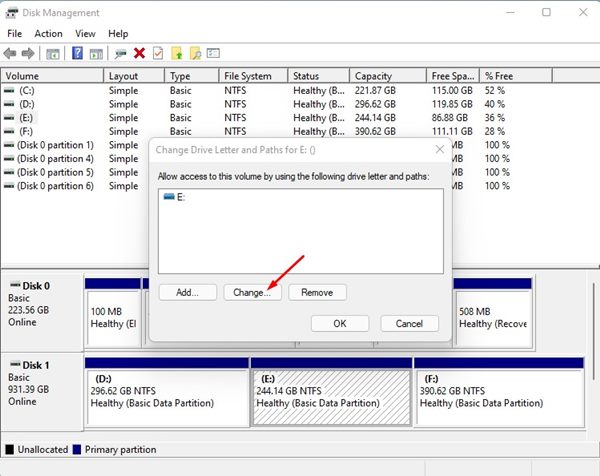
5. On the Change Drive Letters and Path dialog field, click on the Change button.
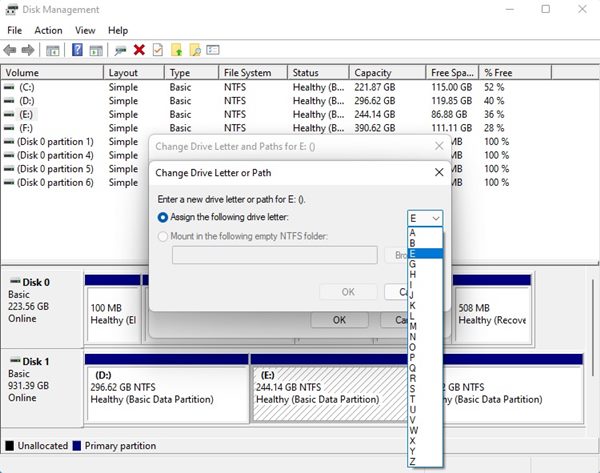
6. Make the most of the drop-down menu subsequent to Assign the next drive letter and choose the letter. As soon as achieved, click on Okay.
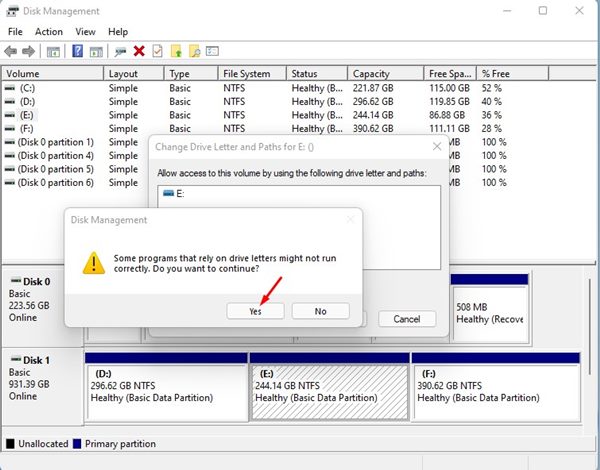
7. You will notice a affirmation pop-up; click on Sure to use the modifications.
8. The brand new drive letter ought to seem on the Disk Administration utility.
9. Open the File Explorer, and you will discover that the drive letter has been modified.
Repair Packages Not Working After Altering Drive Letter
Some software program that depends on drive letters to work may not run after altering the drive letter. Observe these steps to repair the packages that weren’t opening.
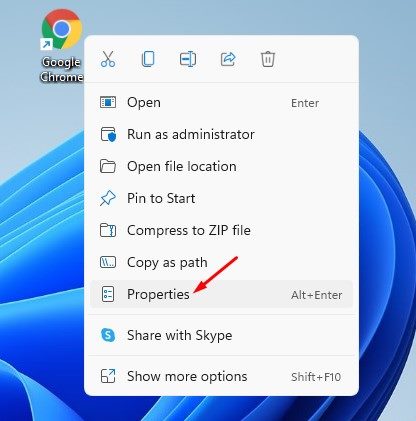
1. Proper-click on the shortcut file for the app that’s damaged. Choose Properties.
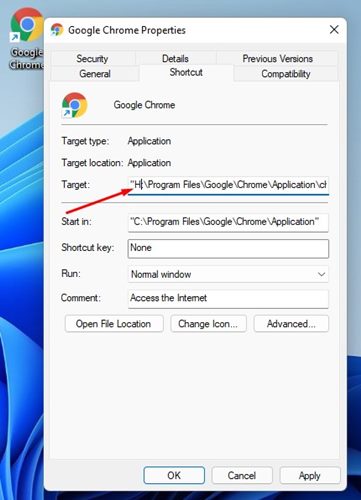
2. On the goal area, change the goal of the shortcut to the brand new drive letter.
For instance, if Chrome was beforehand put in on “E:Program FilesGoogleChromeApplicationchrome.exe”, and also you modified the E drive to H, you want to change the goal area to “H:Program FilesGoogleChromeApplicationchrome.exe”
3. After making the modifications, click on Apply after which Okay.
It will repair the damaged shortcut on Home windows 11. If the packages nonetheless don’t work, you should reinstall them or change the drive letter.
Altering the drive letter is fairly straightforward, particularly on the Home windows 11 working system. You probably have any doubts, tell us within the remark field under.