Generally, you could have toEnable or Disable Network Adapter in Windows 11 whether or not to troubleshoot web issues, swap between Wi-Fi and Ethernet, or reset your community settings. Fortunately, Home windows 11 offers a number of methods to do that, and every methodology is fast and easy.
On this information, you’ll be taught three simple methods to handle your community adapter and regain management of your PC’s web connection.
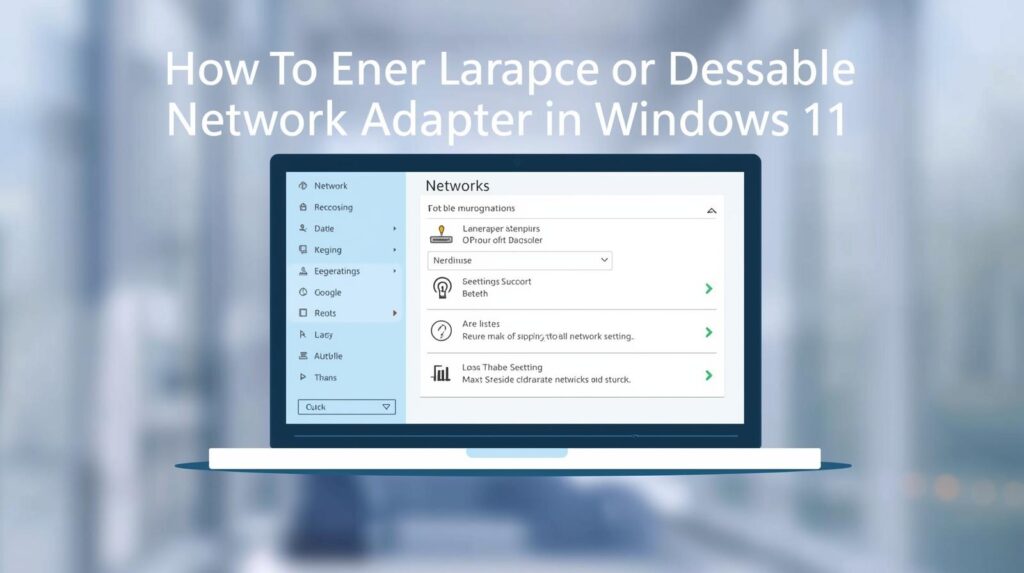
Table of Contents
Enable or Disable Network Adapter in Windows 11
Resetting, allow or disable community adapter in Windows 11. You can even manually flip community adapters on or off by following these strategies.
1. Disable/Allow Community Adapter by way of Settings
This methodology will use the Windows 11 Settings app to show a community adapter on or off. Right here’s what you should do.
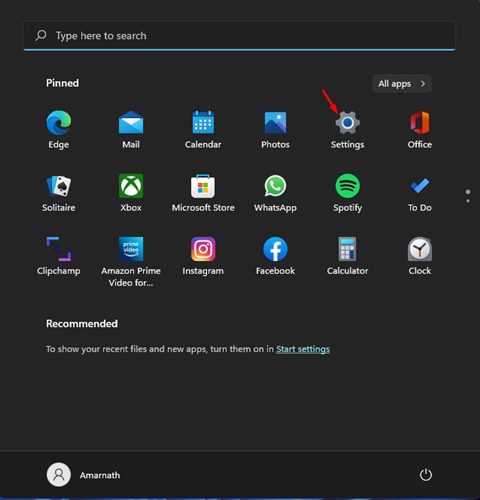
1. Click on on the Home windows 11 Begin button and choose Settings.
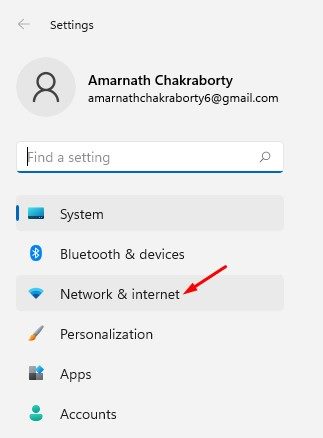
2. Click on on the Community & Web choice.
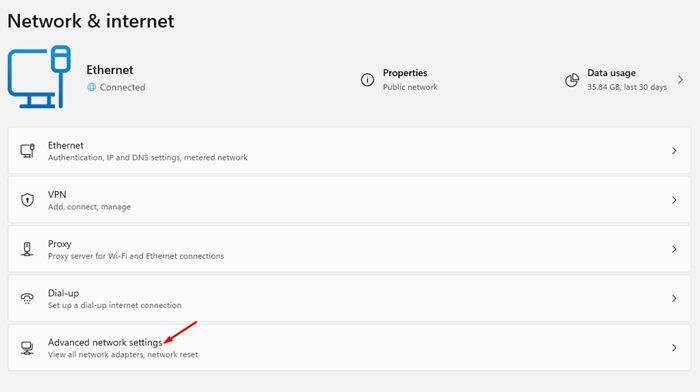
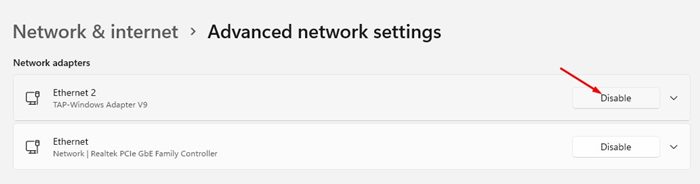
3. Scroll right down to the appropriate pane and faucet the Superior community settings choice.
4. Beneath the Community adapters, choose the adapter you need to disable and click on the Disable button.
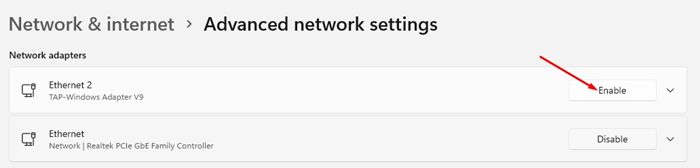
5. To allow the Community adapter, click on Allow.
2. Disable/Allow Community Adapter by way of Management Panel
This methodology will use the Management Panel to disable or allow the Community Adapter. Right here’s what it is best to do.
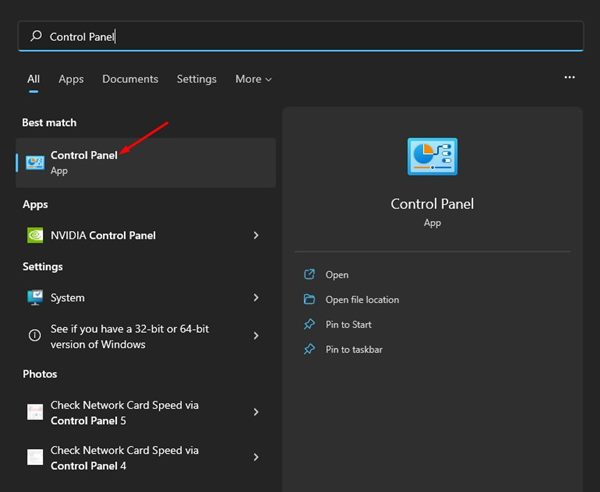
1. Click on the Home windows Search and sort in Management Panel. Choose the Management Panel app from the record.
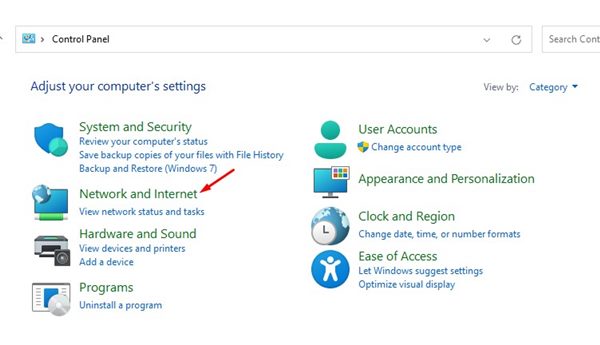
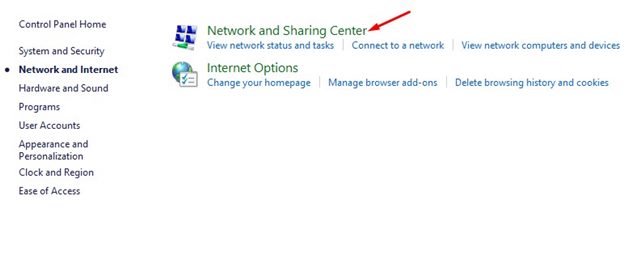
2. Click on on the Community and Web choice.
3. Click on the Community and Sharing Heart choice.
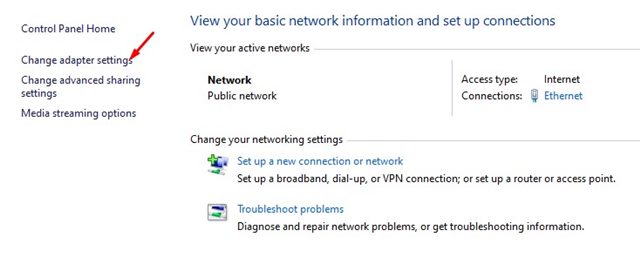
4. Click on the Change adapter settings hyperlink.
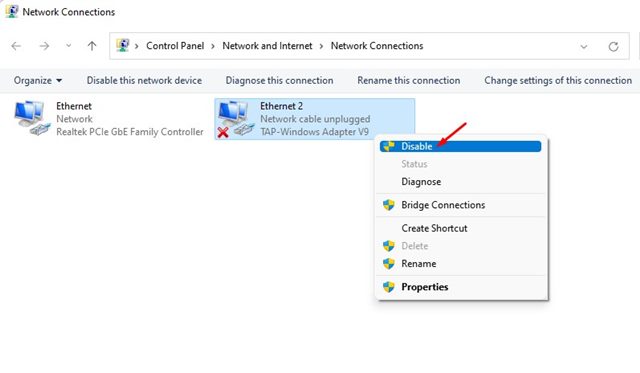
5. It is possible for you to to see all community adapters. It’s good to right-click on the adapter you need to flip off and choose the Disable choice.
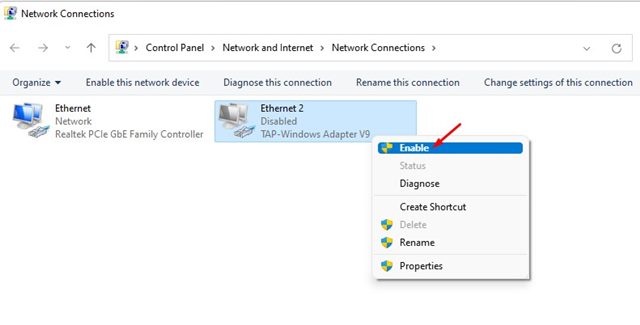
6. Proper-click on the adapter title and choose Allow.
3. Disable/Allow Community Adapter by way of Gadget Supervisor
Just like the management panel, you may make the most of the Gadget Supervisor of your Home windows 11 PC to disable or allow the Community adapter.
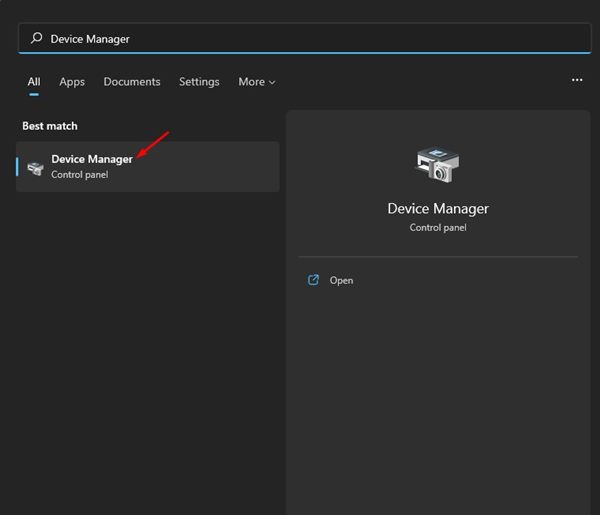
1. Open the Home windows 11 search and sort in Gadget Supervisor. Subsequent, click on on the Gadget Supervisor from the record of choices.
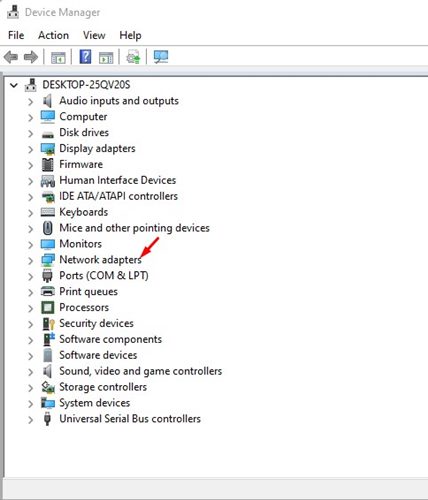
2. Increase the Community adapters.
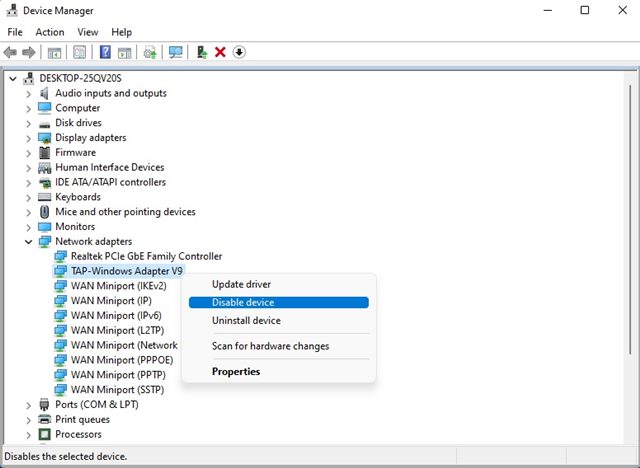
3. Now right-click on the adapter you need to flip off and choose Disable Gadget.
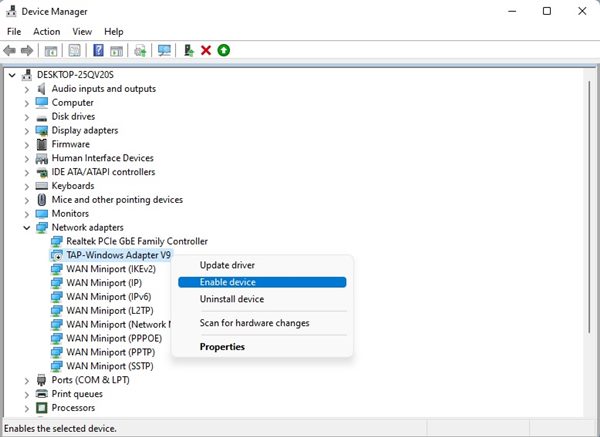
4. To allow the Community adapter, right-click on the community system and choose Allow Gadget.
4. Allow/Disable Community Adapters by way of Command Immediate
You can even use the Command Immediate utility to allow or disable the community adapters on Home windows 11.
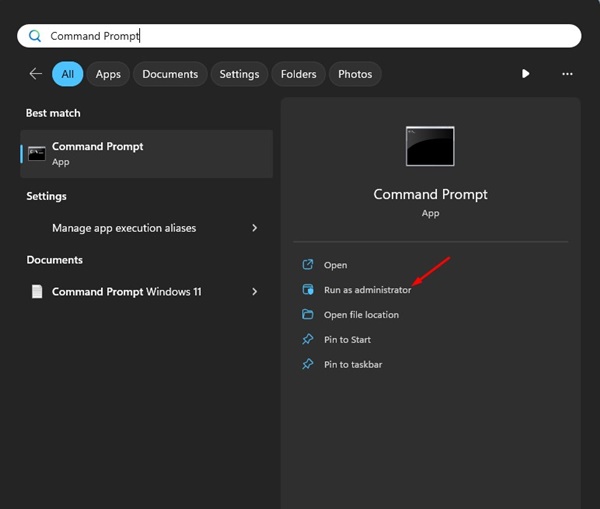
1. Sort Command Immediate within the Home windows 11 Search. Proper-click on the Command Immediate and choose Run as administrator.
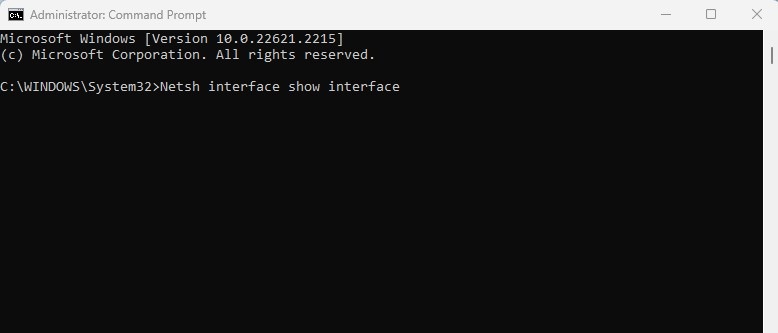
2. Execute this command:
Netsh interface present interface
3. The above command will record all community adapters. Be aware the interface title, which is the community adapter you need to disable.
4. Now execute the given command by changing the Interface title with the title you famous above. (With out citation marks)
Netsh interface set interface "Interface Identify" disable
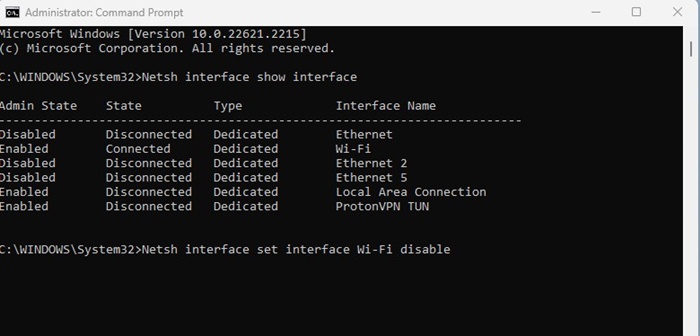
5. The above command will flip off the community adapter.
6. To allow the community adapter, execute the given command by changing the interface title with the adapter title you need to allow. (With out citation marks)
Netsh interface set interface "Interface Identify" allow
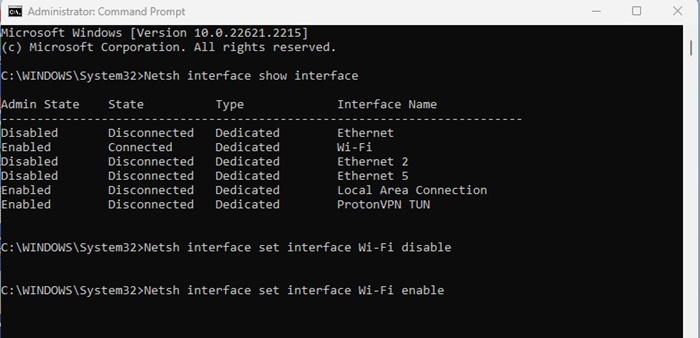
5. Allow or Disable Community Adapters by way of PowerShell
Just like the Command Immediate, the PowerShell utility can allow or disable the community adapters. Right here’s what you should do.
1. Sort in PowerShell within the Home windows 11 Search. Subsequent, right-click on PowerShell and choose Run as administrator.
2. When PowerShell opens, execute the given command:
Get-NetAdapter | format-table
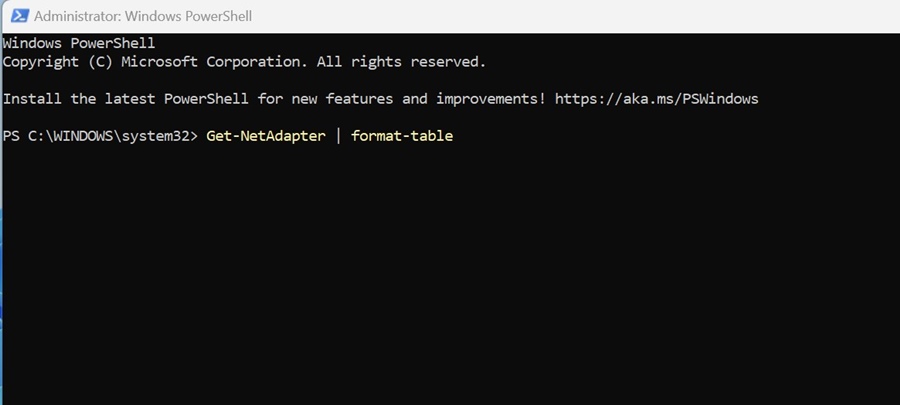
3. You will notice plenty of data. It’s good to be aware down the community adapter title (the textual content displayed beneath title)
4. If a community adapter is enabled, the IndexStatus will present ‘Up’. If the IndexStatus exhibits ‘Down’, the community adapter is disabled.
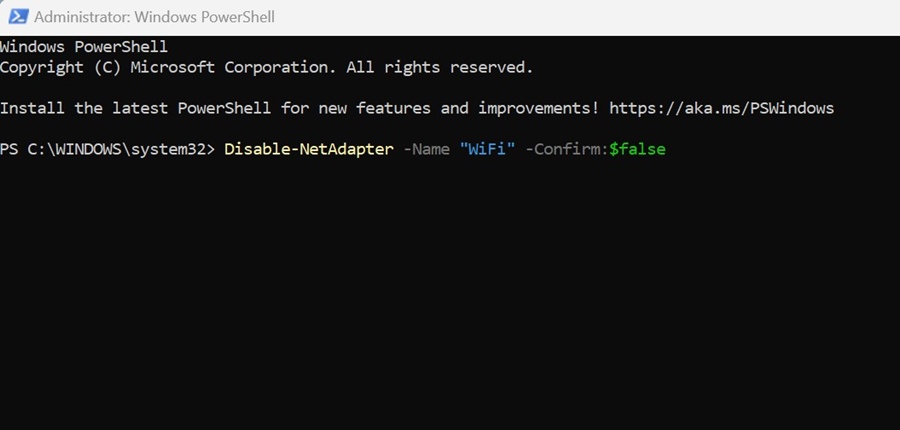
5. To show off a community adapter, execute this command:
Disable-NetAdapter -Identify "Community Adapter Identify" -Verify:$false
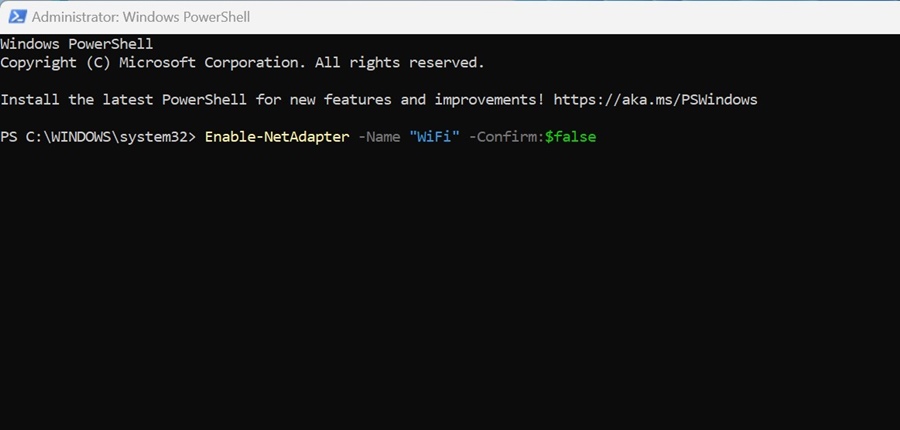
6. Should you want to allow a community adapter, execute this command:
Allow-NetAdapter -Identify "Community Adapter Identify" -Verify:$false
After enabling or disabling the community adapter, shut the PowerShell utility.
Disabling or enabling a community adapter in Home windows 11 is fairly simple. If in case you have any doubts, tell us within the remark field under.
Closing Ideas
Figuring out learn how to allow or disable community adapter in Home windows 11 is an easy but highly effective talent. Whether or not you utilize Settings, Management Panel, or Gadget Supervisor, these strategies allow you to rapidly repair community points, swap connections, or safe your system.
Subsequent time you face web hassle, attempt disabling and re-enabling your adapter it typically works like magic.