Easy Guide: How to Check Apps Draining the Battery on Windows 11
Discover how to identify apps Draining the Battery on Windows 11 and extend battery life. Step-by-step tips to boost your laptop’s performance fast!

Why You Should Check Apps Draining the Battery on Windows 11
If your laptop is a bit old and you have battery drainage issues, it’s time to check which apps are draining the battery life. On Windows 11, you can view battery usage history. You don’t even need to use a third-party app for this purpose.
Check Battery Usage History via Settings
Here, we will use Windows 11’s settings app to view the battery usage History.
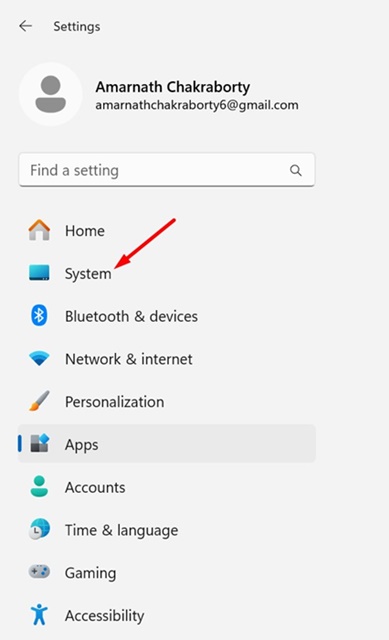
1. Launch the Settings app on Windows 11 and switch to System.
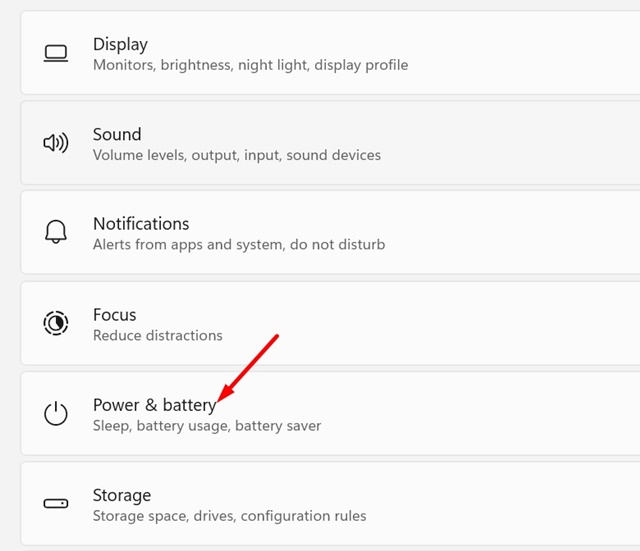
2. Click Power & battery.
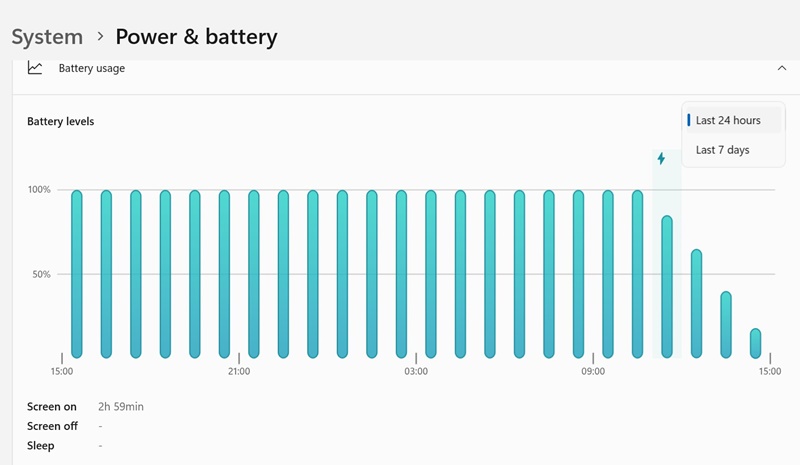
3. Click the drop-down next to Battery levels and select the time frame.
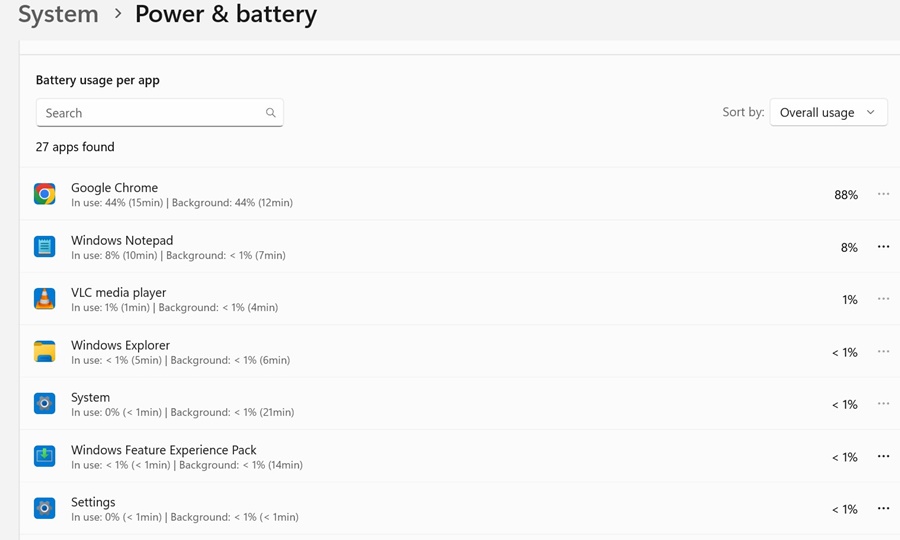
4. You can see the app’s battery usage in percentage.
How to Prevent Apps from Draining the Battery?
If you find that a specific app drains the battery life of your Windows 11 device, you can either prevent the app from running in the background or uninstall it.
1. Move to the Installed Apps screen, Settings > Apps > Installed Apps.
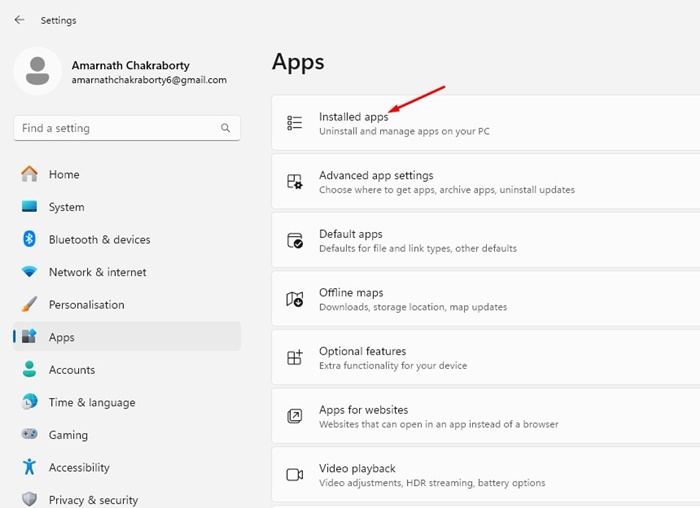
2. Pick the app.
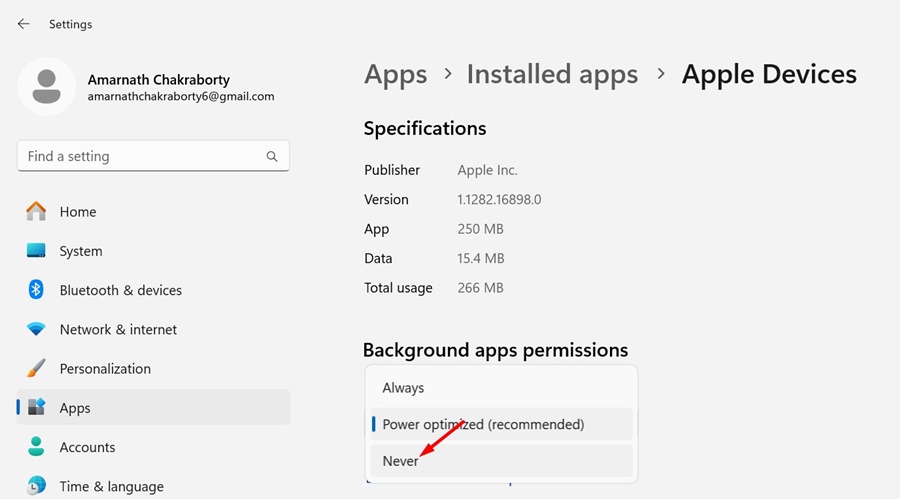
3. On the Let this app run in the background drop-down, select Never.
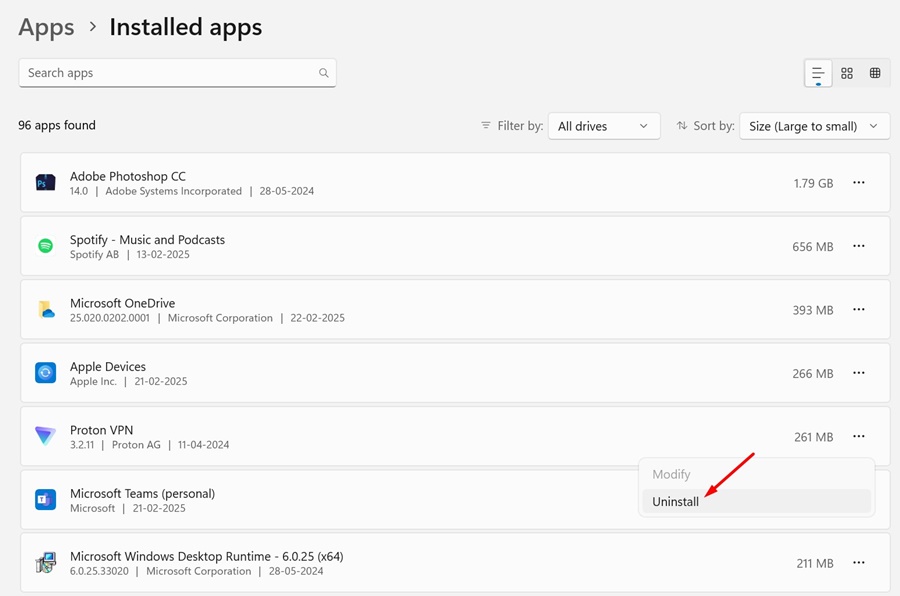
4. Click the three dots next to it and select Uninstall.
Check Battery Usage using Task Manager
To monitor real-time battery usage on Windows 11, you need to use the Task Manager.
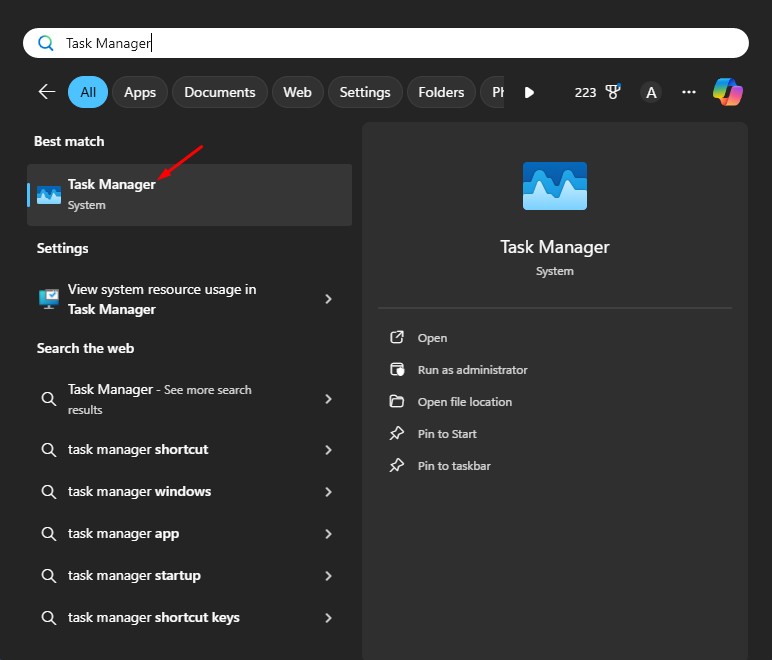
1. Open the Task Manager from the Windows 11 search.
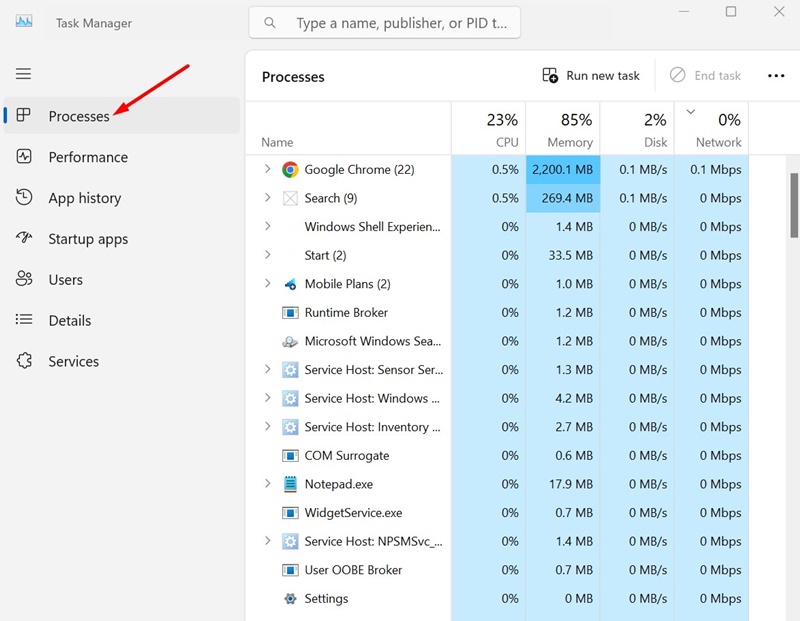
2. Switch to the Processes tab.
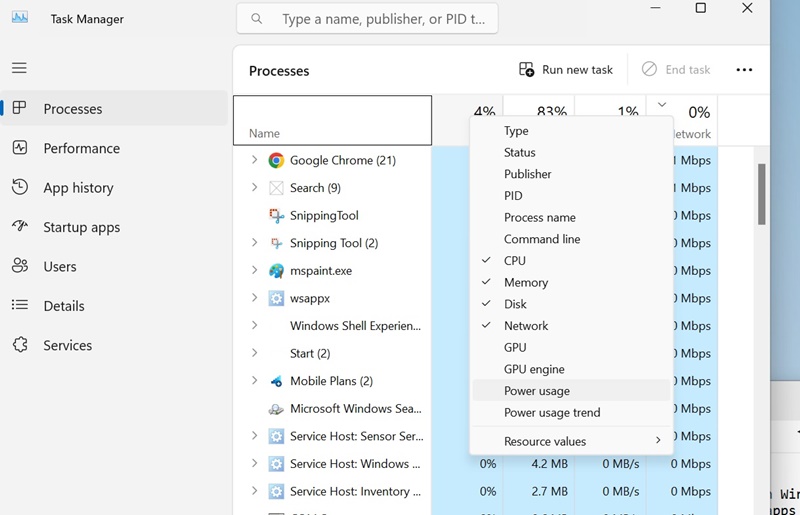
3. Right-click an existing column and enable ‘Power Usage’.
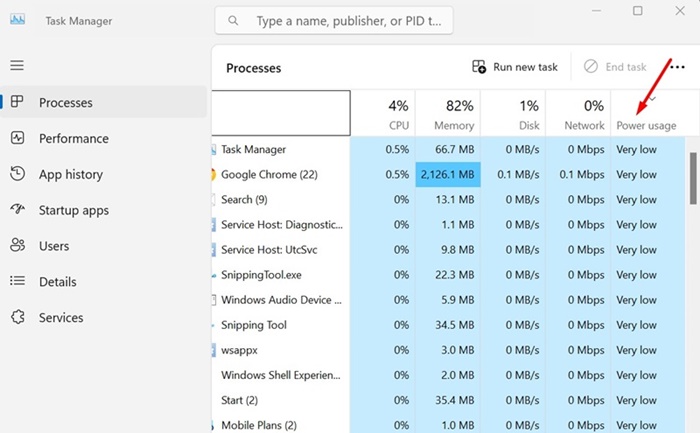
4. The Power Usage column will list each running app’s battery usage.
This guide explains how to check which apps are draining your battery on Windows 11. Let us know if you need more help with this topic in the comments.


